Finally, I decided to do this in blue instead of red. So without further ado, here are my designs so far. After the pictures, I added a really cool tip how you can trace these patterns.
But first a disclaimer...
I think I take the worst pictures on the net. A 90 year old who has never held a camera could do better. My dash hound could do better with her paws tied behind her back. The flash went off, I had the exposure open too far (I hit a button by accident), and it was really dark outside. When I should do is take 2 minutes and take the pictures again, but nope, here they are. Wince and enjoy!


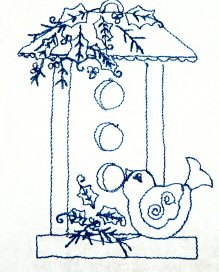

Gack! These are worse that I thought. I think I will redo them, but you get the idea. These were done free motion with thick thread (to mimic hand work) using my sewing machine and they averaged around 7"x8", so they are pretty tiny. Those leaves were tricky and the snowflakes were fudged a bit. O
On to the tip.
Did you know you can print on water soluble Solvy? And that you can iron in it too? Oh yes you can! So here is what I did:
1--cut a strip of 8.5 x 11 piece of freezer paper.
2--have a piece of solvy about the same size as the freezer paper.
3--Iron the solvy onto the freezer paper. Iron both sides. Do NOT have steam going. Remember this is water soluble solvy so water will disintegrate it.
4--cut the solvy to the same dimensions as the sheet of freezer paper.
5--Scan the image from the book you want into your computer. Or take a picture of it and then crop it to whatever size you want. Or do like did and download the book from the internet (PLEASE buy these books and don't pirate them) and you will have the images already there.
6--Place the freezer paper/solvy sheet into your printer and print.
7--Give the sheet a few minutes to set, then peel the solvy off of the freezer paper. Finish printing all of your images and you are ready to go!
When these were printed, I pinned the solvy sheet onto my fabric and started sewing. I did not use a stabilizer or hoop, but that is not a bad idea..
PPS--I am relieved to say that Michelle received the give away book. That was fast delivery. I enjoyed that so much I think I'll do another one before Christmas. Stay tuned!
I see nothing wrong with your pictures or the embroidery specially since it's done free motion by sewing machine which blows my mind:) I love red and blue work but I do it the old way...by hand.
ReplyDeleteThat is a fabulous idea to use freezer paper and Solvy.
It looks great! Glad to see you working on it. But when are you going to Las Vegas?
ReplyDeleteI am super impressed that you created these on your machine, wow , wonderful work but I think I will stick to hand work for this type of sewing :-)
ReplyDeleteWow! Amazing! Thanks for the tip on using Solvy.
ReplyDeleteThese are beautiful, I'm just giving bluework a try myself but by hand, I enjoy the down time :)
ReplyDeleteThank you for the tip.
I'm doing these by hand in red! Wow that you did them in blue and on your sewing machine! So cool! Nice meeting you!
ReplyDelete