Hello!

I love to dye fabric, make thread pictures and quilt. I live in the Yukon on an acreage with my husband, 2 dogs and 34 fish. It's the 'good' life.

Thursday, November 22, 2012

Happy Thanksgiving!

I am back from Vegas and was not arrested, assaulted or robbed, so it was a pretty boring trip.

Here is a big happy thanksgiving wish to all of my many  both of my American blog friends. Gobble, gobble!

Friday, November 9, 2012

Viva Las Vegas!

Well we are off! Hubby and I are going to Vegas for the first time tomorrow.

I hope this is me:
Image1


And not this:


But what happens in Vegas, stays in Vegas, so you may never hear about it..  ha!

See you all in a week or so.

Wednesday, November 7, 2012

Red work

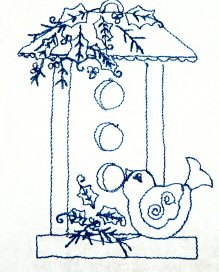
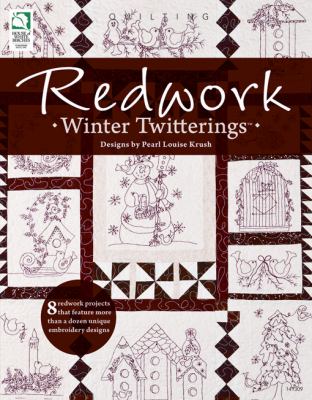
In my post yesterday <<ahem>> I said I would show some of my Red work. I actually hate, loathe and detest any form of handwork, but I love the look of red work. What's a girl to do?  I decided to do this on my trusty sewing machine.  A pattern I have wanted to try for some time now is the Winter Twittering pattern by Purl Louise Krush. I took this to the retreat, but it was not worked on at all.


Finally, I decided to do this in blue instead of red. So without further ado, here are my designs so far. After the pictures, I added a really cool tip how you can trace these patterns. 
But first a disclaimer...

I think I take the worst pictures on the net. A 90 year old who has never held a camera could do better. My dash hound could do better with her paws tied behind her back. The flash went off, I had the exposure open too far (I hit a button by accident), and it was really dark outside. When I should do is take 2 minutes and take the pictures again, but nope, here they are. Wince and enjoy! 


Gack! These are worse that I thought. I think I will redo them, but you get the idea. These were done free motion with thick thread (to mimic hand work) using my sewing machine and they averaged around 7"x8", so they are pretty tiny. Those leaves were tricky and the snowflakes were fudged a bit. O

On to the tip
Did you know you can print on water soluble Solvy? And that you can iron in it too? Oh yes you can! So here is what I did:  
1--cut a strip of 8.5 x 11 piece of freezer paper. 

2--have a piece of solvy about the same size as the freezer paper. 

3--Iron the solvy onto the freezer paper. Iron both sides. Do NOT have steam going. Remember this is water soluble solvy so water will disintegrate it. 

4--cut the solvy to the same dimensions as the sheet of freezer paper. 

5--Scan the image from the book you want into your computer. Or take a picture of it and then crop it to whatever size you want. Or do like did and download the book from the internet (PLEASE buy these books and don't pirate them) and you will have the images already there. 

6--Place the freezer paper/solvy sheet into your printer and print.

7--Give the sheet a few minutes to set, then peel the solvy off of the freezer paper. Finish printing all of your images and you are ready to go!

When these were printed, I pinned the solvy sheet onto my fabric and started sewing. I did not use a stabilizer or hoop, but that is not a bad idea.. 


PPS--I am relieved to say that Michelle received the give away book. That was fast delivery. I enjoyed that so much I think I'll do another one before Christmas. Stay tuned!


Tuesday, October 30, 2012

Its Done?

This week I worked a bit more on ‘the truck’. It has taken me a lot of time to finish this piece because, quite frankly, I started it out in an unsatisfactory way and needed time to noodle out how to proceed.
Overall, I am content with this re-creation but there are a few things I would do differently. I'll talk about this later.

I normally do not do this, but for some reason I messed around with the trees and while they look good after, they had looked really good before hand.

The fall fireweed looks better now that it was been tweaked and I like the look. It took about 10 colour changes to get to this point however.
fireweed close up
fireweed
I ended up with a wicked ripple after all that work and the only way to control it, other than cutting the design and and restitching it, was to do some vertical zigzag across the whole grass area. This did relax the speed bumps a lot. Unfortunately, like an idiot, I used a really light brown, like a taupe, to do this and I had to spend several hours covering it up with reds, greens and browns.

Oh well, I'm Ok with it now.

I really should spend more time  getting the engine more realistic looking, but those shadows are killing me. I'm really not much of an artist and black just looked like a gigantic hole. I should get some highlights on the little pine trees. And the rust colour around the fenders detracts rather than enhances the great curve of this fender.

But as I said, I am OK with it so far..

So thanks for listening! I am going to put this on my design wall and come back to it at some point. Talking it through has made me see the areas I want to work on.
Tomorrow I will show you my redwork (bluework actually) that I am doing by machine since I don’t “do” handwork.. It’s a great Christmas project. 

Sunday, October 28, 2012

Tin Lizzy Fun

My friend Robin got herself a very nice Tin Lizzy system and I went over to help her set it up properly.


Five hours later, four You Tube videos and several cups of tea, we had it figured out and I had completed this quilt.


This is the result of the 5 minute block  I had read about by Kathy on Tamarack Shack. The blocks themselves took us hours to do, and I blame Janet's unusual decision to have 5 or 10 glasses of wine plus a gin and tonic when we were cutting fabric. Well, she probably had 2 or 3, but she is a lightweight and it made us giggle. Luckily, we have enough for another quilt and got these together. 

And yes, lots of other quilters laughed at us for how long these blocks took. I stole a bunch of their fabrics and embellishments, so take THAT laughing girls. Take. That. 


I lked Kathy's idea of a simple meander around the cream area and I totally stole her pattern for the brown wheels. I ended up doing those on my own Bernina since I didn't have enough time on the longarm (and Robin was going away).

So now it waits for Janet  to put on the binding on when she returns from her wonderful holiday in Newfoundland.  I am sure her boss is going to be tickled to get this quilt. I think I need to make one for me.

PS--I have 2 more quilts I was hoping to quilt before Christmas, so I am going to do nice things for Robin in the hopes that she lets me use her machine again. I told her that the Tin Lizzy is a perfect size for 'us'.  LOL LOL


Friday, October 26, 2012

The Winner Is....

drum roll please.....

Michelle G!   Michelle blogs at Love Chinook Winds in Calgary. Michelle, I was born in Calgary and lived in Montgomery along the Bow River until my family moved to the Yukon when I was 12 years old. I went to University there for my first degree (Sociology) and still have family and friends in Bowness. I know exactly what a Chinook wind is and often pray it will come north, but it never has..Anyway, congrats on the win!

For everyone else, I just want to thank-you all for sending me a note--I love to hear where you all are from and what you do. I even met another Yukon quilter (hi Vivian!) so it was a win-win for me as well.


Dahn   :-)

Saturday, October 20, 2012

Give Away!

I love books. Educational, thrillers, mysteries, self-help, humour and everything in between. Mostly though, I love quilting books.

I received a number of new books recently and I ordered this one twice! Since I don't really feel like going through the hassle of sending it back,I am giving away this book:


What an awesome book! Many of the projects use hexies and really simple quilting designs. There are some good, quick tips and as expected, some crisp and detailed photos throughout. On top of that, Malka's blog is great too..

OK--here are the RULES!  You must be a real person, living somewhere in the world and you must leave a comment. (and it wouldn't hurt to follow me!). I will ship world wide.

The draw will  CLOSE Wednesday, October 24 @ 6pm PST.  

I'll post the winner on Friday, October 26.

Good luck!     :-)

Sunday, October 14, 2012

Trees-Continued

Thank-you for the nice comments yesterday! Given that there is some interest, I am going to post more about thread painting trees—my way. Believe me, I am no expert, nor would my final pieces win any prizes, but I like to think about myself as an enthusiastic amateur.  : )

It is always a good starting point to find something familiar and close to you and use that as your inspiration. For me, I have no further to look then from the window of my craft room.
Yard
Yes, I know I am lucky. And yes, I do know there is snow on the ground. I am trying to ignore it.

Way back when, I initially thought the colours of pine trees were brown, ash and black. And I kept trying to make realistic looking trees in these colours and was never happy. One day at 40 below I had had enough. I grabbed my threads and ran outside in open toed crocks to find out what the true colours were. I  held thread up to the tree as my husband stood inside shaking his head. Yah, he does this a lot..  I remember I was shocked at how off the colours were that I was using. Pine tree don’t have ash or black colours, and the brown I was using was not even close to the brown of the bark. My pine trees actually look like this (see below), and the threads that matched it are light grey, dark grey, chocolate brown and butterscotch brown.
 tree2
   tree thread2
Another tree in my yard is the birch tree. I was using light grey with a green/yellow and black for the knots and bands across it. Again, I got the colours completely wrong. The true colours of the bark are light moss green overall with mid moss green striations in certain areas and smoky grey knots and bands across it.  Sorry I do not know the real colours of these these greens, but I hope the pictures help.
Tree1    Tree thread1
Lets talk more about birch tree. Below is the way I started creating a match for birch trees (click on it to see a larger image if you want). So that you know, I do this every time I try something new. Yes, I really do. The birch tree are the green ones, not the 2 trees on the far left.

This chart was made when I had just started thread painting and I wanted to capture everything I was doing. What colour thread to use, what the tension should be on the top and the bobbin and what width I was using for the zigzag. It was really helpful. Even though my newer ones have less writing, the way I test thread and tension has not changed.
birch trees
And yes, it IS hard to slow down and do a sample sheet like this. I am a free spirit and like to jump into things with both feet without a plan or roadmap. That may be the way you want to do thread play and I encourage you to just go for it! And if you ever want to be more ‘scientific’ about the process, I hope you remember this post. Maybe it will give you a direction to go in when you want to chart your own process. And maybe you will always wing it and do terrific work.

Later this week I’ll show you what I do once I have the samples—how I practice actually drawing trees. That is definitely the fun stuff!

Saturday, October 13, 2012

Embroidered Trees

I love to read Monika's blog and see what beautiful thread painting she is working on.  As a nod to her awesome ability (and current piece), I am sharing how I do trees. Well, at least how I test how I will do trees.

Here in the Yukon,our growing season is short and the winter is long, so our trees take years to mature. They often do not get very thick—for instance a 8” diameter tree could be 50 years old. Since these little trees are 'my' reality, many of my practice tree pieces are thin, straight ones.

Whenever I try a new design in thread, whether it is a tree or a flower or a bunch of grasses, I always do some test pieces and label them for future reference. I have made quite a few of these practice sheets and they are invaluable for reference at a later date. Its surprising what you say you will remember, then when you want to do that technique, you can’t remember how.

In the picture below, you can see that I adjusted the top tension quite a bit and played with the bobbin. I do have a dedicated bobbin that I do not adjust the tension on, but this is a recent purchase. I have found that I could always readjust the bobbin tension back to normal quite easily. I know this makes some people nervous, but not me!


Why do I adjust the tension? If you look at the 7th and 9th trees from the left, you can see that the bobbin thread pulled up to the top and this is what adds a two tone colour to the trees. And I didn't have to do any fancy stitchin'! I had black thread in the bobbin and light grey on the top. Major contracts can make neat affects while subtle ones add tones and highlights.


I am so glad I started doing this because now I have a binder full of tips and examples..
Binder
Over the next couple of weeks, I’ll show you more from this book if anyone is interested..

Tuesday, October 9, 2012

Pinterest Fun

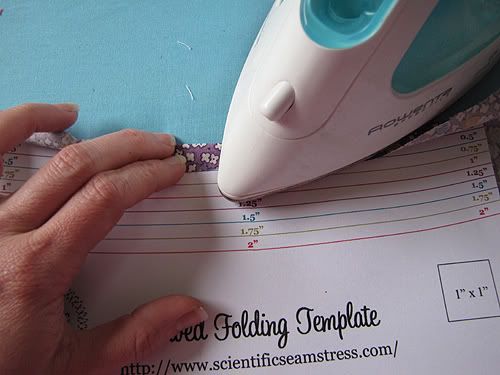
I Pin a lot of things, and recently I added something that I thought might be useful at some point. Little did I know that I would need it this soon. Last night I made some curtains and remembered this template from Scientific Seamstress that I used to add a neat and tidy seam allowance. Mine can sometimes go wonky, so this came in handy. She also offers a curved seam template--very nice!
Scientific Seamstress


Another Pinterest find was the Magic PillowCase that has a french seam in it. It is a really fun way to make a nice pillowcase (and I used up a lot of ugly fabric).. sorry--I don't have a picture right now.

And finally, here is one that I need to make since I cannot stand light of any kind in my eyes when I am sleeping.  LOL
Silly eye mask